Dyeing with Rust on Fabric

Rust on linen and photo transfer by Flora Doehler.
I’ve been experimenting with dying rusty objects onto fabric. Fabric artist friend of mine, Marilyn Preus, used this technique in one of her beautiful wall–hangings and I had to try it out for myself!
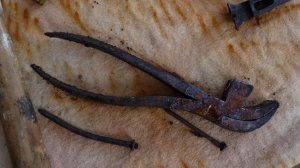
The key ingredient for this is to find rusty objects and we still have quite a few of those in our barn. Thank goodness I didn’t throw everything out when we moved in last year.
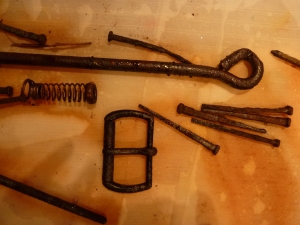
Suddenly all those funny bits of nails and who–knows–what seemed like a pirate’s booty and I was so glad that we haven’t quite got to sorting things out in the barn.  I was also glad that we saved so many of the handmade nails that came out of our house during renovation. They have all rusted at this point and could be used for my project.

 Iron nails that are more than 100 years old.

 Rusty nails, hooks and buckles.
 Rust dyeing works best on natural fabrics so I used cotton canvas,  linen, and silk for my experiment.  I also tried dyeing a piece of polyester-cotton but the results were very poor.

After placing my pieces on the fabric, I squirted the entire pieces with vinegar until the cloth was saturated.
 Rusted pieces laid out on poly cotton and silk.
 I slipped the plastic board that held the fabric into a large plastic bag and let everything sit for 48 hours.
 Vinegar dissolves rust.
 My art room smelled like a fish and chips store for a few days!
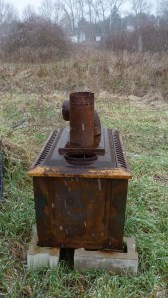
 I wanted to use a ribbed pattern to dye the cotton canvas  and I found just the thing in an old wood stove pipe that is resting in the backyard.

 Thankfully this old stove of ours missed the dumpster.

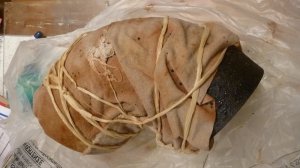
 I brought the stove pipe into the house, and wrapped the cotton canvas around it. Then I poured vinegar all over it and place it in a bag where it sat for 48 hours.

I loved the result when I unwrapped the cloth but unfortunately I washed it before it had a chance to really set so I had to redo my steps again. I learned to rinse in cold water and then let the cloth dry and sit for another 2 days before attempting to wash with soapy water.

The shapes that the ribbing in the stove pipe made are reminiscent of a birds wing. I am now looking for donations of rusted rebar because I think that would be very cool.
 Rust dyed canvas from rusted stove pipe.


Why this experimentation with rust dying?  I am working on a piece for a show here called “Pirates and Outcasts”. This art show will be part of a Bear River Winter Carnival event. Both are wonderful opportunities to have fun in February.

I have been working with an image transfer as well. It’s an abstracted photo of young men sailing to this new world in the early 1930s. These men were in their 20s and are probably all dead now.  One of them was my father although this isn’t a portrait of him per se.  In the piece I create, I want to suggest the impermanence of all our situations as well as suggesting that immigrants are both casting out and are outcasts.

 I have ideas floating around in my head,  but there are still the technical details to master!

This piece was on linen and although I liked the placement of the metal pieces, for some reason I had difficulty getting enough rust on the cloth.

After a couple of attempts I decided to roll up the cloth with those rusty pieces and spray the heck out of it and shove it in a bag for three days!

 When it was finished it certainly had a lot of rust marks on it! The shapes weren’t as controlled as I would’ve liked them to be and in retrospect I wish now that the photo image transfer had been larger.

I also rusted a piece of silk and discovered that the most interesting results happened in rusting this piece. Look at the detail in this piece of fabric, especially where the spring was placed.

It is back to the drawing board for me or to the rust heap!  I am also experimenting with the image of my young men with paint on a canvas which I may show you next… and there is also the landscapes  that I continue to work on… plus I just dug out my weaving books and am considering threading the loom again….  so much to do–lucky me!
Posted by Picasa

Painting the Historic Gardens in Annapolis Royal

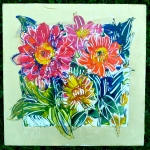
In the Begonia Garden by Flora Doehler, 2010. 8″ x 8″

This past weekend I joined over 70 artists to Paint the Town’ in Annapolis Royal. This annual fundraiser for the local Arts Council is a great opportunity for artists to show and sell their work and for collectors to watch artists at work and to buy art at reasonable prices.

The Annapolis Region Community Arts Council (ARCAC) has sponsored the event for years and the weekend runs like a well-oiled machine. Artists arrive from all over Nova Scotia…over 7o painters this year. The artists set up all over town.
Plein Air Painting kit
If you are curious about the contents of my painting kit, click on the photo and read the notes at Flickr.
Volunteer ‘runners’ circulate and pick up the finished pieces in pizza boxes and take them back to the gallery at the Legion where they hang for sale all day with a ‘gallery’ price determined by the artist. At 5 o’clock the unsold work is auctioned by silent auction. The Arts Council gets 50% of the amount and thousands of dollars are raised this way every year.


The Artist entry fee is $12.


I was thrilled to be able to set up my paints at the Annapolis Royal Historic Gardens. This park is an oasis of flower garden beds organized around the centuries of the town.
The first morning I scouted around the park with its ancient trees.
I set up in a great spot with dappled light under towering trees. The begonias were a riot of colour and were nicely contrasted by blue salvia flowers. I pulled out all my gear and promptly dropped my piece of German Plum Cake upside-down on the grass. Not to be discouraged, I brushed it off and enjoyed it with my coffee while I studied the flowers and thought about my painterly approach to them. Meanwhile birds hopped around and sang and it was wonderful to be there.


Surrounded by happy flowers.

Wonderful until I realized that I’d forgotten to bring containers for my paint water!! I finished my treat and headed for the recyling bin where I found plastic juice containers! My sharp knife soon transformed them into water jars and it was smooth sailing after that.

Here are the works I painted in the Begonia garden on Saturday. (Click on the images to enlarge them.)
The next day, Sunday,  I spent the early morning in the Victorian Garden while there was still some shade to work in.
The colours were vivid and the zinnias were taller than me. At one point a butterfly was brought out and released to much fanfare.


This was my largest painting. I used up all my matt medium on it.

My Sunday problem was that I ran out of matt medium! It’s an essential part of my kit because I use it to get the scratching-in effect in my paintings. I searched out other artists in the park and was given some by artist Shannon Bell and when that ran out, a bottle of the stuff from Louise Baker, an artist with a love of colour who lives in Halifax. Thank you Louise and Shannon!!!

Here are the paintings I did in the Victorian Garden until the sun drove me away. (Click on the images to enlarge them.)

After the heat of the flowers and the sun, I decided to seek out a cool, shady, quiet spot. I found this at the Lily pad pond.
The mosquitos thought it was a pretty nice spot too, in spite of my liberal spraying of citronella. In fact a couple wandered by while I was painting and asked me if I could tell them which flower was giving off that scent. I told them that I was the flower and we had a good laugh over that.


The challenge here was to edit the elements down to make sense of the scene in a painting.

They were visiting from Montreal and I told them about the silent auction. They later lost out on the bids for 2 of my pieces, but found their way to our studio the next day where they bought 2 paintings that I had been working on in my garden. Here is one of them:

Nicotiana
Nicotiana in garden chez moi.


It was truly wonderful to connect with some of the people who bought my works. Over half of the purchasers and bidders had watched me paint in the park. They connected with my interpretation and they also connected with the setting. I think it was nice for them to see the process (well, not the dropped plum cake part). Oh, did I mention that all 12 paintings and sketches that I did over the weekend sold? It’s three days later and I’m still flying high about it.
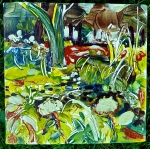
These were my paintings at the lily pond. (Click on the images to enlarge).
At the end of the day I sketched the scene for myself with marker and brush on damp paper. A charming woman from New York walked by to admire it. She thought it would make a gorgeous wallpaper. I told her that it was my souvenir of the weekend and she suggested that I offer it at the silent auction so that she could bid on it.
Well I did and it sold for $50. Here it is for you to see:


The Pond sketch on 9″ x 12″ watercolour paper. ( The paper is actually white)
Acrylic paint brushed into damp paper.

It was an exciting weekend on many levels – wonderful to meet painters, wonderful to have such a positive response to my work, wonderful to create in such an inspiring setting. And, wonderful to earn some money too which was just as well because our house water situation was failing while I painted.

See you next year at Paint the Town!

photo courtesy of Trish Fry, Annapolis Royal Historic Gardens.

Printmaking with Foam and a Ballpoint.

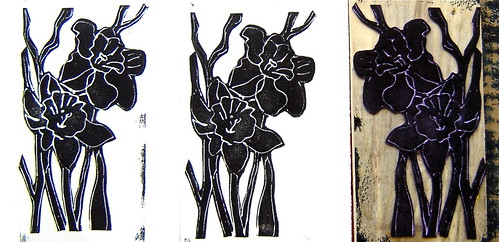
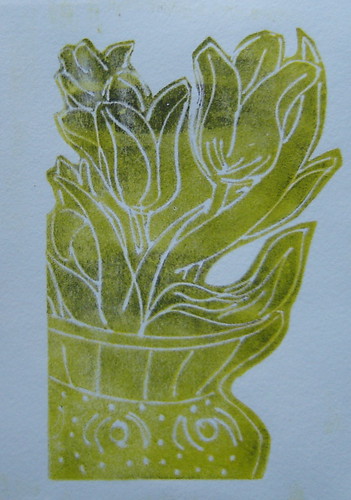
Tulip print and print source.
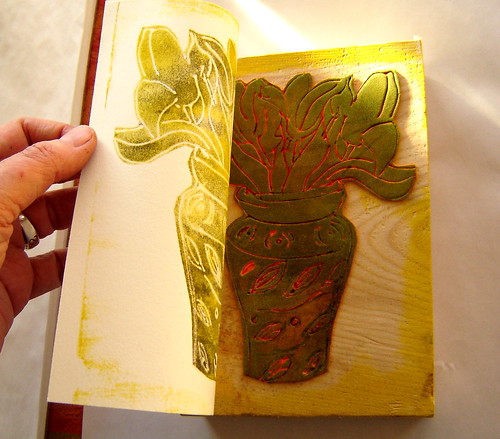
Tulip print and printing block.

I have always loved printmaking. Maybe I have in my blood. My father was a Linotype operator and my mother was a writer and an artist who painted with oils and pastels.

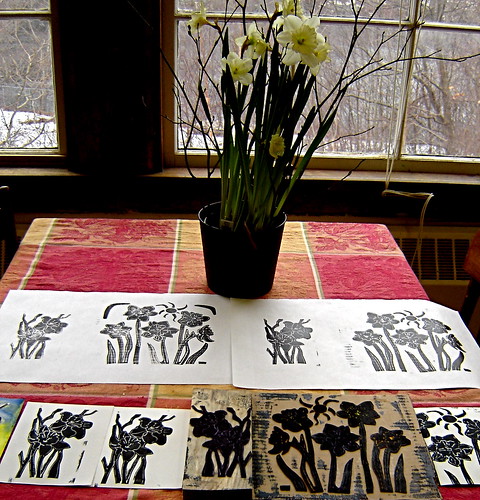
The inspiration for the prints was this cheerful pot of daffodils.

I am one of the few people who actually likes the smell of oil paints –but I digress. The online course in fibre arts that I recently took used stamps in the projects so I decided to save some money and to make my own.

Pulling a proof.
Pulling a proof.

The problem was I couldn’t find my woodcuts carving tools as they are either still packed away in a box somewhere or they didn’t make the trip here 18 months ago when we moved.

Print of tulips.
Oil print on cotton rag paper.

Something that I am learning in Bear River is how to improvise. When people live on reduced means and are far away from stores that supply everything, they are forced to get inventive. This kind of creativity and innovation is a skill that I didn’t develop very well growing up in the city.

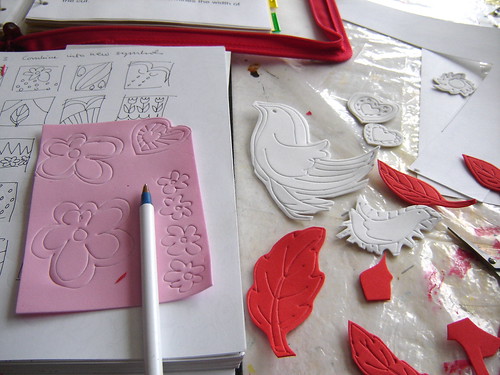
Making a print using foam.

I’d like to think that the innovation is rubbing off on me now because I have figured out a great way to make a stamp for printing using readily available tools. I’m sure this is not original — probably several hundred other people have figured it out already, but it still excites me.

Glue foam pieces to board backing.

I’ve made a little video to show you how to do this and if you try it I hope you have as much fun as I am having!

In the past couple of weeks I’ve been printmaking. I enjoy the resulting high contrast and the textures in printmaking, and I want to bring that same feel to my next painting.

I added line and colour to this print.

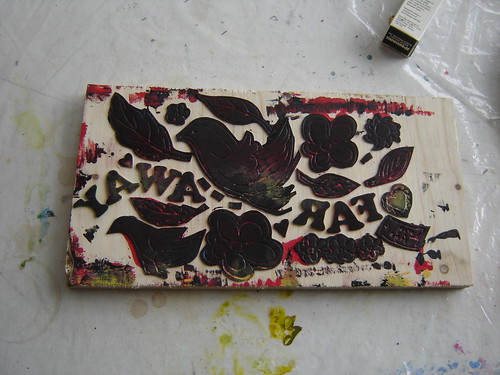
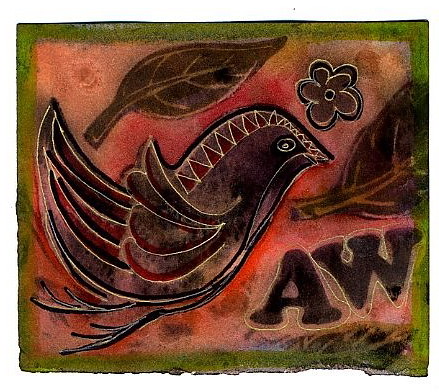
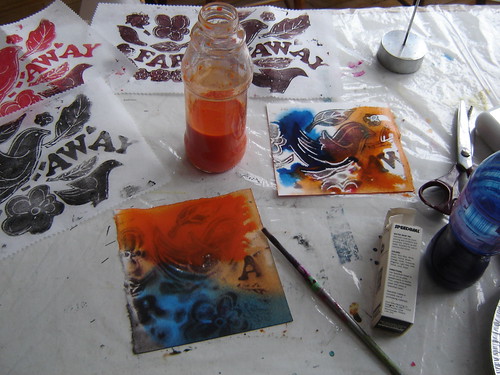
This is a story of how one thing leads to an unexpected other thing. The online personal symbols class led to this printmaking experiment. In a later post, I’ll show you how it has impacted my painting.

Printing and painting.
Adding watercolour to the print which is printed on watercolour paper.

Fibre Arts Course — online from South Carolina

While my main form of artistic expression is painting, working with textiles has a big appeal for me too.

Playing with fibres in the studio.
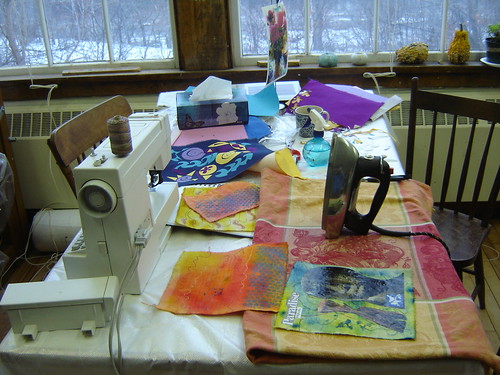
Playing with fabric and fibres in the studio.

At different times in my life I have woven, screen printed on fabric and sewed with appliqué.

Cotton warp.
Hand woven cotton warp.

My approach to textile work is very similar to painting. In both cases I use strong colour; I enjoy lots of texture and I use the interplay of light and dark and complementary colors.

Fabric painted with acrylic, printed with bubble wrap.

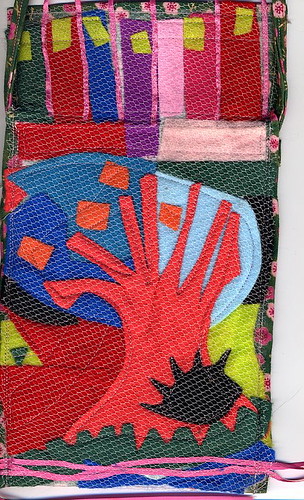
Many, many well-known painters have worked in this medium. Last spring in Los Angeles I saw some beautiful paper appliqués by Matisse in the museum there that inspired me to sew this little bag.

Cotton, arctic fleece, netting and ribbon.

My daughter Emily is an animator and I am inspired by how she integrates her animation sensibilities into her sewing.

Emilys handmade doll.
Emily designs, sews and paints dolls and creatures.

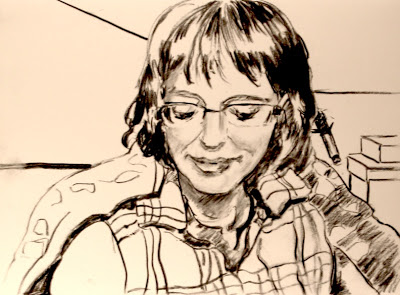
Another source of inspiration for me is artist’s blogs and sites on the Internet. I check the daily blog of my friend and fellow painter Barbara Muir. I love her use of colour and we had many shows together in Toronto. Her persistence at writing a daily blog about painting inspires me to create and make better use of all the precious time I have.

Barbara drew me while we talked on Skype!

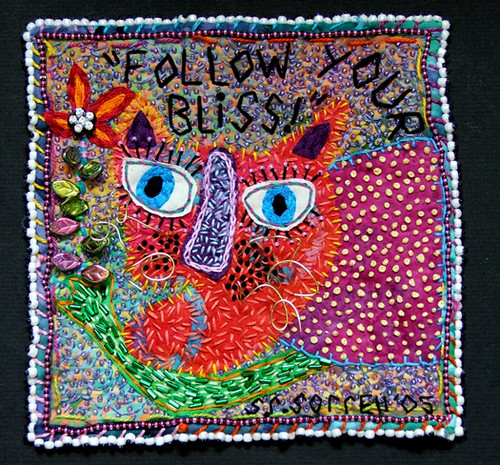
Recently I came across the site of Susan Sorrell, a fiber artist. Her work excites me because of her bold use of color and texture. I signed up for an online class with her called Personal Symbols — who could resist signing up for a course with the name like that!

Susan Sorrells work
Susan Sorrell’s work.

Susan has been teaching for a number of years and the course comes with PDF handouts with lots of photographs. She has a forum on the Internet for the class where participants can show and tell their progress. I haven’t used the exact materials on her list. I’m adapting what I already have. Susan suggests painting fabric dye on interfacing fiber, but I’m using canvas and watered-down acrylics.

The assignments use a combination of drawing, painting and sewing which is quite exciting for me to combine.

Combining symbols
Combining symbols.

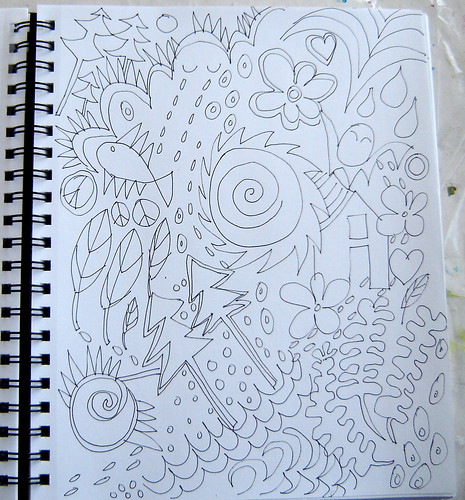
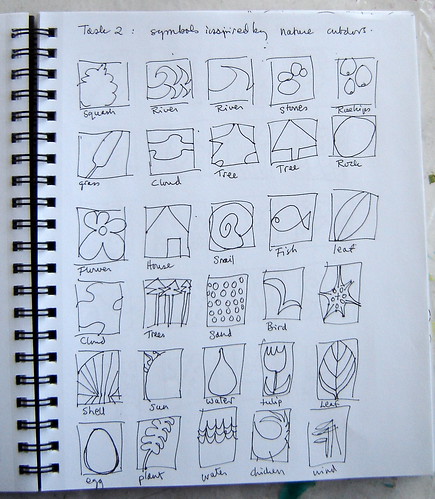
There are at least three assignments connected to each of the six lessos. Ingeniously she had each of us draw and make up some of our own symbols.

My symbols
My Symbols.

In the following image I have cut out and combined some of my symbols. The fabric is cotton and I ironed a stitch witchery product to the back of the cloth before I cut the pieces out. In this way the pieces stuck down when ironed. Then I embellished it with buttons and beads.

I would like to try some of these techniques in acrylic on a large canvas. It’s nice to know that it’s possible to take a course online and to feel so inspired by it and by the links to images and blogs and websites of other participants.

[youtube=http://www.youtube.com/watch?v=DXjgxxdJPtE;rel=0&w=425&h=350]

Susan Sorrell offers quite a few different online courses. Her enthusiasm comes across loud and clear and I would recommend any of her courses. She also hosts a monthly chat with people in the creative arts and that is quite inspiring too.

The course is opening a new world for me…a truly virtual community of people combining paint and fabric and a passion for creativity.