Step into my studio and let me show you an easy way to create a new painting using collage and paint. Text of the tutorial follows.

I wanted to share with you a fun painting exercise that will help you loosen up and expand your painting skills.
And why would you want to do that? Because experimentation is one of the best ways to become familiar with and confident about our medium of choice.
When I am at a loss with the way forward on a painting, I use this approach to have a little fun. It is my opportunity to make lots of mistakes which will teach me new information about the medium that I can use in my future paintings.
The canvas I’m painting today is 12″ x 12″. It started with a green background from its previous life as a landscape.
I mixed orange, red and white together with gel medium so that I could create a surface that I could easily scrape through. You can only get that beautiful clean line if you add gel or matt medium to your paint.
At this point there was a lot of texture on the canvas mostly due to the 2 paintings underneath this one. I wanted to take advantage of that texture that had built up so I used a green gold transparent fluid acrylic with water and painted the leaf shapes. I love the texture that it gave me. This is something I will absolutely use in my larger paintings.
Our studio is heated by a wood stove so I carefully propped the canvas on it to dry.
But it was taking too long so I finish the drying with my studio hairdryer.
I cut tulip shapes out of an acrylic painting on paper that I had discarded.
Next, I covered the canvas with a thick layer of gel medium to glue my tulip cutouts.
Then I decided to add more green to the bottom of the canvas to suggest grass. In hindsight it would have been better to do this step before I smeared gel medium everywhere.
I painted some of the green gold onto bubble wrap and printed it onto the canvas.
Next I pressed my tulip shapes into the wet gel.
Some of the paper was curling up so I took a piece of plastic wrap and carefully put it over the painting to smooth the gel so that there would be no ridges and also to make sure that the paper had complete contact to the canvas. This was tricky as the paint from the bubble wrap was still wet and I didn’t want to smear it everywhere.
I added a few more circles by dabbing the bottom of a pen with paint and then stamping that onto the painting.
You can see that the gel dries completely transparent.
I felt that it still needed some line and decoration so I got out my painting swatches and chose a few colours that I thought would go well with this painting.
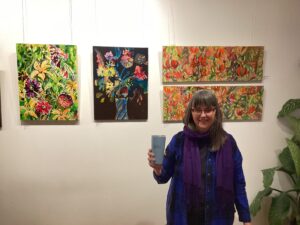
When I looked down at the scarf I was wearing I realized I had chosen the same colours!
In fact they are also the same colors that are in the large floral painting I’m working on.
Whether we realize or not everything we do or read or watch or see is percolating inside us. Everything has an influence and impact on our next steps.
Here is my final piece.
Have a wonderful day of experimentation!
Flora,
I discovered your intense vibrant painting a number of years ago when you demonstrated how to make monprint with watercolor.
I admire your work and your generous demonstrations. Your recent video on paint a background with gel was thought provoking.
So thanks and Happy Spring.
Hi Margot! Thanks for your message. I love to share what I do and I’m glad you enjoyed it. Happy Spring to you too. (We are expecting a snow storm tomorrow, but par for the course in March.)